Archive for the ‘nature crafts’ Category

Paper Plate Dreamcatcher

Sunday, March 3rd, 2013

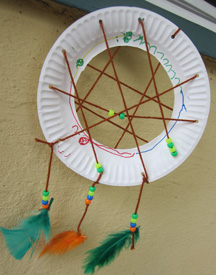
Combine this fun project of making a dreamcatcher with a lesson on Native American culture. Kids can hang this dream catcher over their bed. Be sure to set out plenty of different yarns, beads, feathers and markers so children will have creative choices.

dreamcatcher

paper plate dreamcatcher


What You Need: 1 white paper plate, yarn, feathers, beads, hole punch, scissors.

How to Make It: Cut out center of paper plate and recycle or set aside for another project. Draw on plate with markers. Use hole punch to punch 10 to 12 holes about half an inch from the outer edge of the plate. Weave yarn through the holes so it forms a web pattern. String some beads as you are weaving. Cut three smaller lengths of yarn, string beads on them, and tie a feather to the end of each one. Tie each of these to the bottom of the plate. Tie another piece of yarn at the top of the dreamcatcher to hang it. Younger children may need help with scissors and knot-tying.
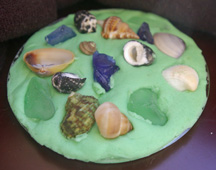
Play dough coaster with rocks and shells

Monday, February 4th, 2008

Play dough coaster with rocks and shells
Alec, now 3, got the supplies to make this coaster, trivet or wall hanging at a birthday party. The dough was in a zip-close bag to keep it from drying out. This would be a great affordable activity for preschool, day care or any party, as well as an at-home activity.
What You Need: Purchased or homemade play dough (we love the recipes at www.makeplaydough.com); any size disposable plastic drink cup lid; assorted small rocks and shells (purchased or collect your own.)
How to Make It: Spread play dough into lid. Then, children press rocks and shells into the dough however they’d like. Let dry and pull off the lid. Depending on how “even” the top is, you now have a great coaster or a decorative hanging!

Pinecone turkey

Thursday, October 11th, 2007

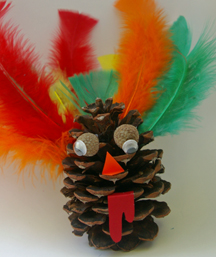
Here’s a fun Thanksgiving project made with things you can find in nature!
Pinecone turkey
What You Need: Pinecone; 2 acorn tops; 2 googly eyes (optional); scraps of orange and red cardstock or construction paper; 6 to 8 feathers (dyed or natural); scissors; glue.
How You Make It: Use glue to stick feathers in back of upright pinecone. Glue on 2 acorn caps for eyes (they should slide right over the pinecone parts). Add googly eyes. Cut out orange triangle for beak and red wattle shape and glue on.

Pinecone mouse craft

Thursday, June 7th, 2007

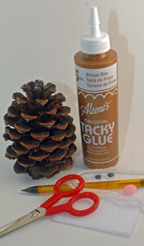
What You Need: Pinecone, white or black yarn, white or black felt, glue and/or “Glue Dots,” 2 googly eyes, pink or black pompom for nose, scissors, pencil.
supplies to make pinecone mouse
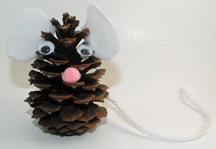
How You Make It: Trace ear shapes on white felt twice and cut out. Use liquid glue to adhere ears to top of pinecone. Glue on eyes and nose. Cut length of yarn and adhere at back of mouse for tail.
pinecone mouse
“We tried it” tip: If your pinecone is not very “dense,” it could be hard to adhere the googly eyes. You could use Glue Dots or a similar gooey adhesive.